Virtualization tour: The perfect start with the Collax V-Cube
10.06.2024
Welcome to our virtualization tour: The perfect start with the Collax V-Cube. Your key to corporate virtualization.
In this tutorial, we will show you step by step how to install the Collax V-Cube, set up the licence and create a new virtual machine (VM).
https://collax.com/en/articles/v-cube-testdrive/
Installation of the Collax V-Cube
1. Download the latest version of the Collax V-Cube installation image
Product downloads
Download 30-day test license
To get a 30-day test license for this product, please complete the form below. After a short while, the license will be sent to the e-mail you specified.
Invalid email address
Download a free one-year license
For private or commercial use
To get a one-year license for the private or commercial use of this product, please complete the form below. If you want to use the license commercially, be sure to specify the name and e-mail address of your company.
A maximum of one free license may be operated simultaneously by a legal or natural person. Pure evaluation and test installations are exempted from this rule.
Upon submission of the form, the download of your ISO file will start automatically. After a short while, the license will be sent to the e-mail you specified.
Invalid email address
- You can download the V-Cube ISO image from:
https://collax.com/api/redirect/iso/cvc - To get a free test license, go to
https://collax.com/en/articles/v-cube-testdrive/
2. Create a bootable USB stick with the downloaded ISO image
- Download the
win32-image-writertool from launchpad. - Plug the USB stick into your computer.
- Unpack the downloaded zip archive and run
Win32DiskImager.exeas administrator by right-clicking the file and selecting Run as administrator - Under Image File, click on the button to open a file, then select the ISO image and click on Save.
- Select the drive letter of the USB stick under Device in the DiskImager interface.
- Start the copy process by clicking on Write and confirm the action.
- After the writing process has been successfully completed, you can remove the stick and start the installation.
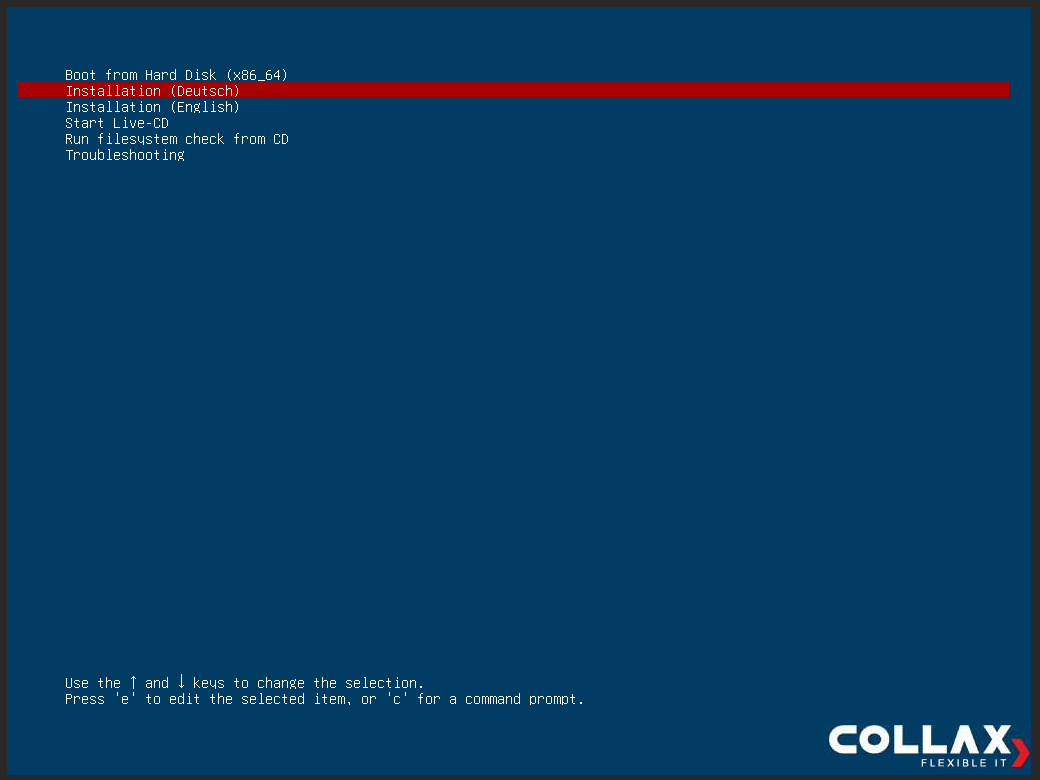
3. Installation process
- Insert the bootable USB stick into the server.
- Restart the system and boot from the USB stick.
- Select the
Installationoption in the boot menu. - Choose the hard drive for the installation.
- Select the network card for the local network.
- Specify the basic network settings (IP address, network mask, gateway and the hostname of the system (FQDN)).
- Start the installation and wait until the process is complete. The installation only takes a few minutes.
4. Initial server configuration
- The system restarts automatically after installation. Now remove the installation medium.
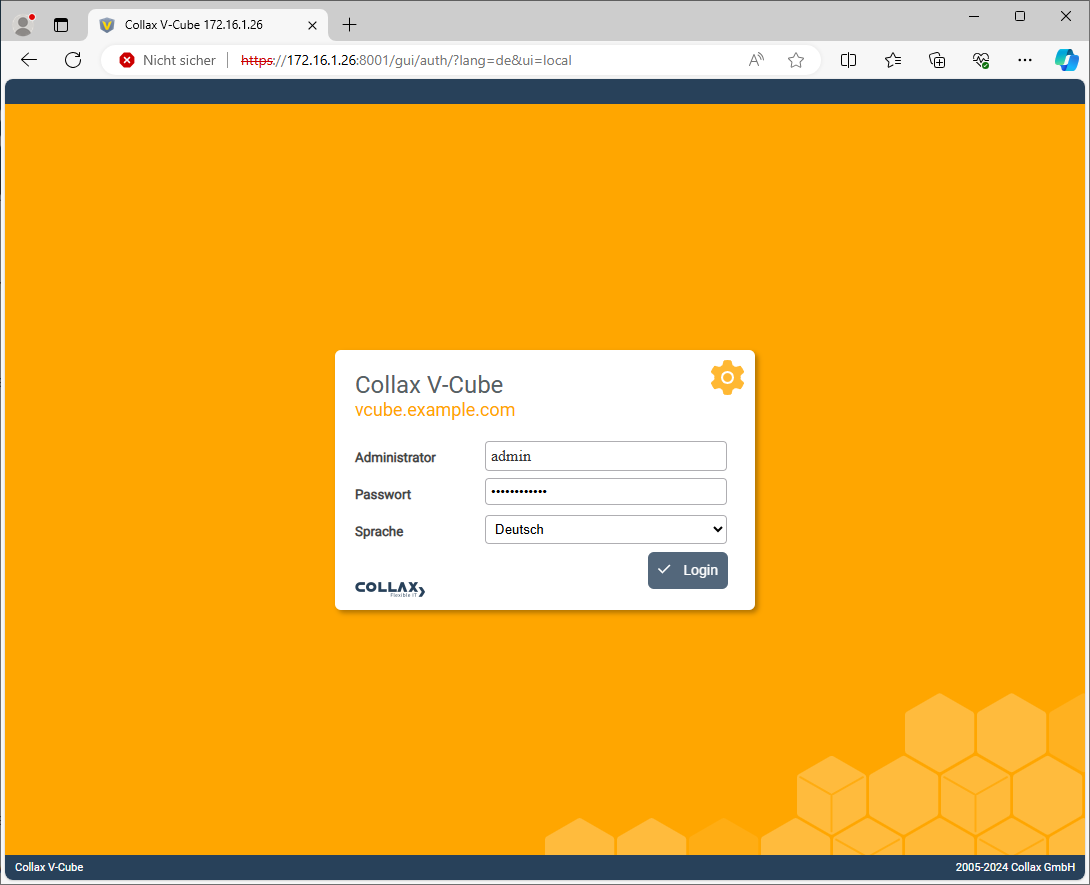
- Now open a web browser on your workstation and enter https://192.168.9.9:8001 in the address bar to access the administration interface.
- Please replace the IP address with the one you have assigned to your system.
- Now assign secure passwords for the ‘admin’ and ‘root’ accounts.
Theadminpassword is required to log in to the web interface, while therootpassword is required for system-wide access.
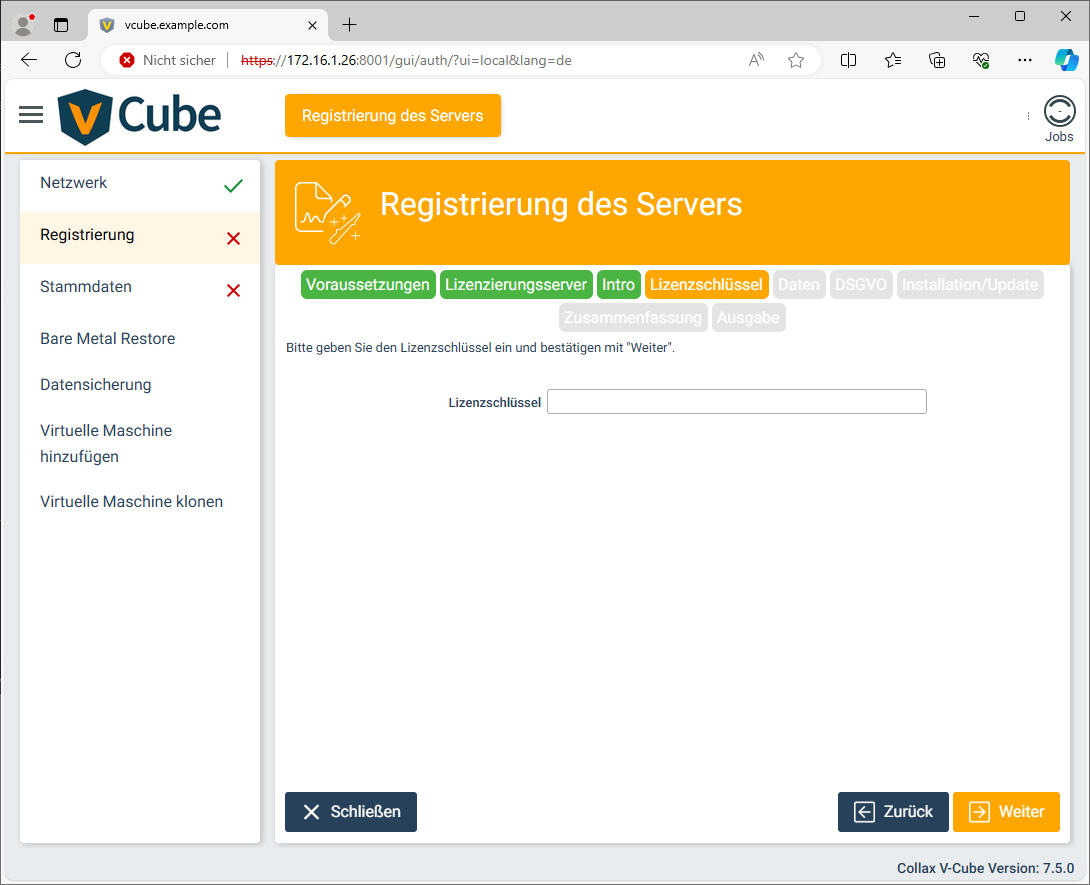
5. Final steps
- Just a few more steps and you can make full use of the Collax V-Cube functions. You will now be guided through the individual wizards.
- Enter the licence key and complete the registration by clicking on Finish.
Virtual Machines
6. Creating a virtual machine
- The wizard helps you to set up a virtual machine. Enter a name here and select the type of operating system you want to install in the virtual machine.
- Select a DVD/CDROM installation medium for the virtual machine here. You can choose from the media that you have previously copied to this system, but you can also upload a medium via your browser.
- Specify how much RAM and how many virtual processors are to be provided for the virtual machine.
- A network interface is automatically added to the virtual machine. Please select the virtual network to which this VM is to be connected.
Alternatively, you can also create a new virtual network and connect it to the physical interfaces of the system. - Enter the size and type for the virtual machine’s hard drive before concluding the wizard.

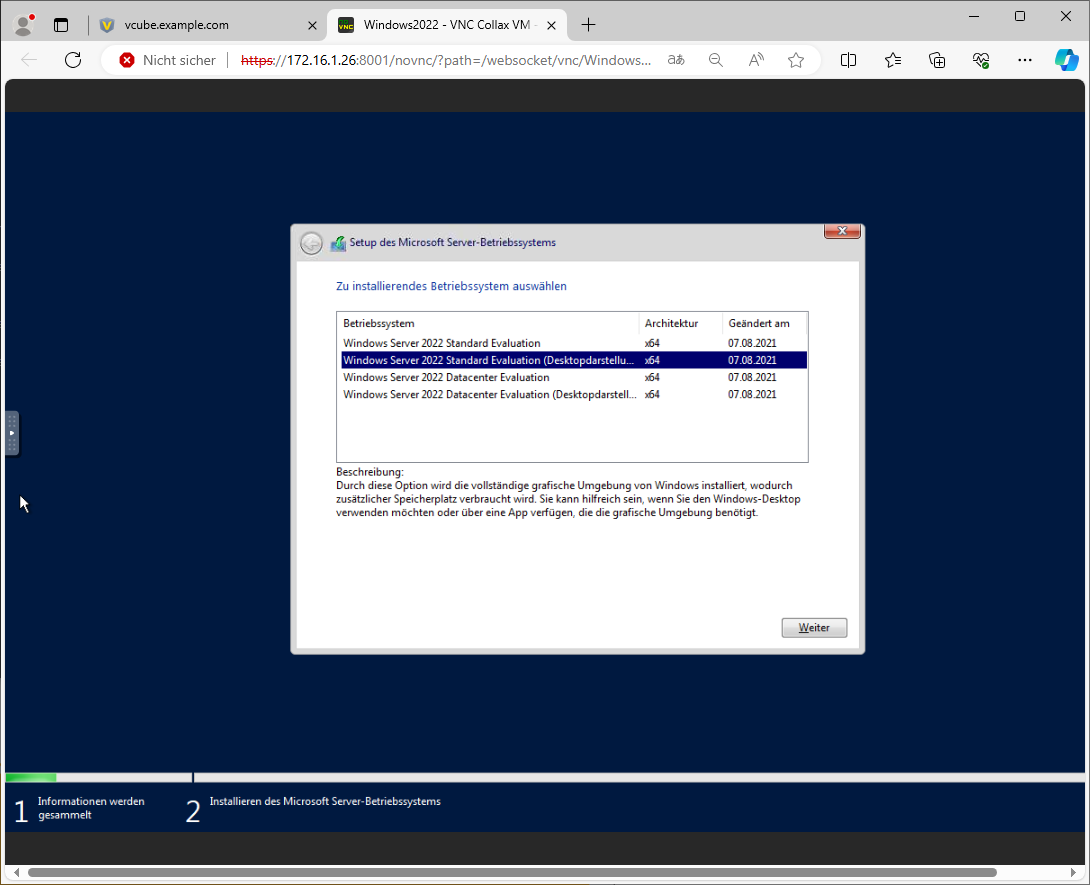
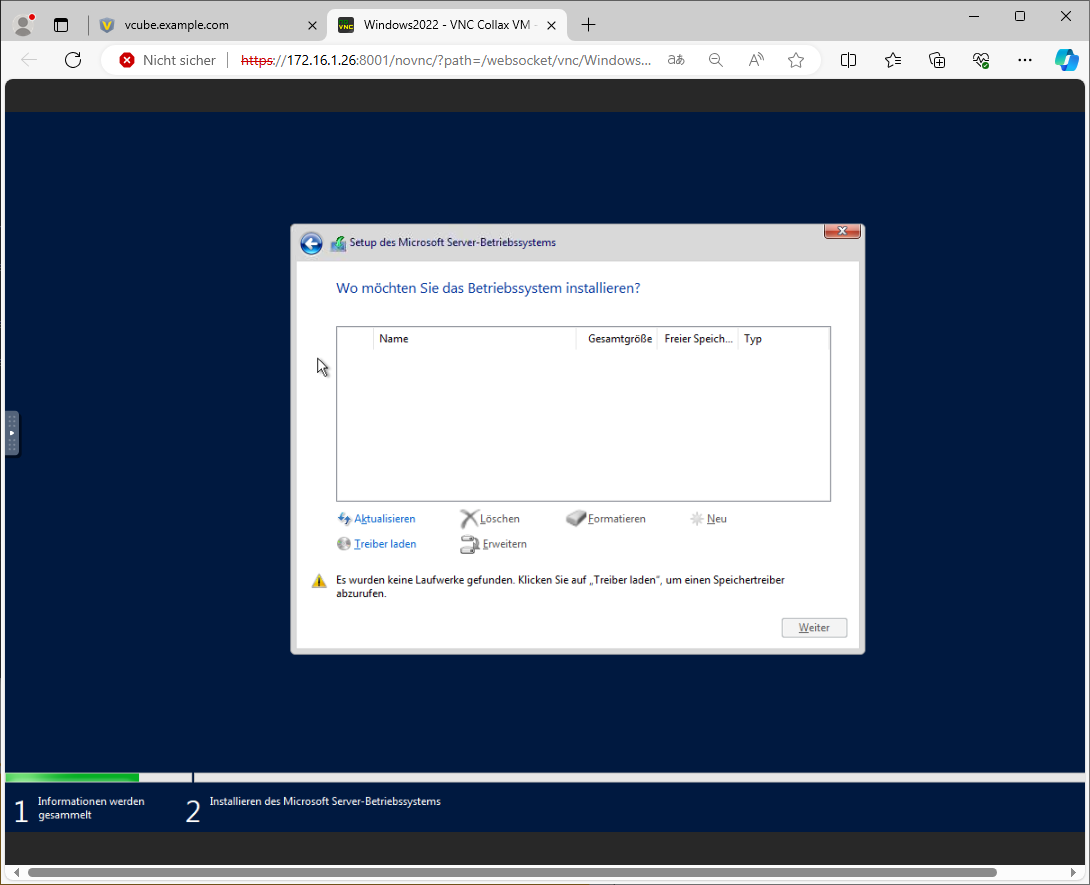
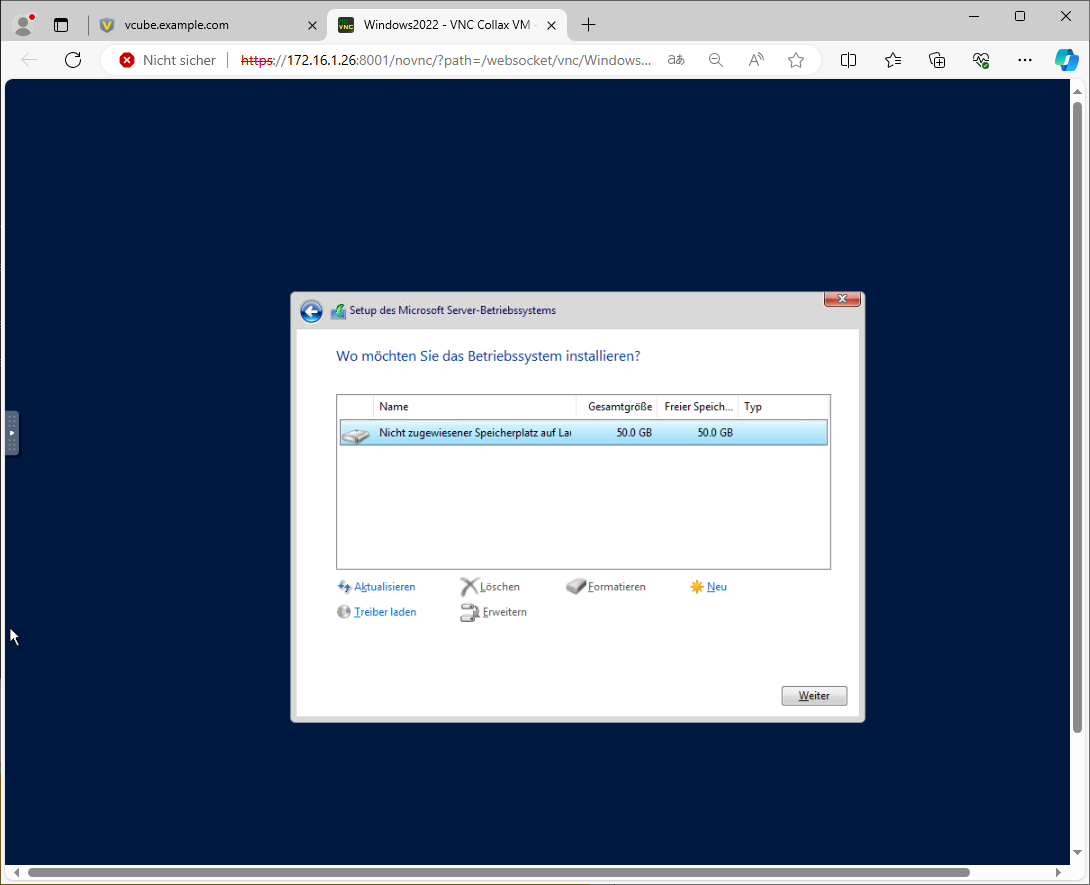
7. Install operating system
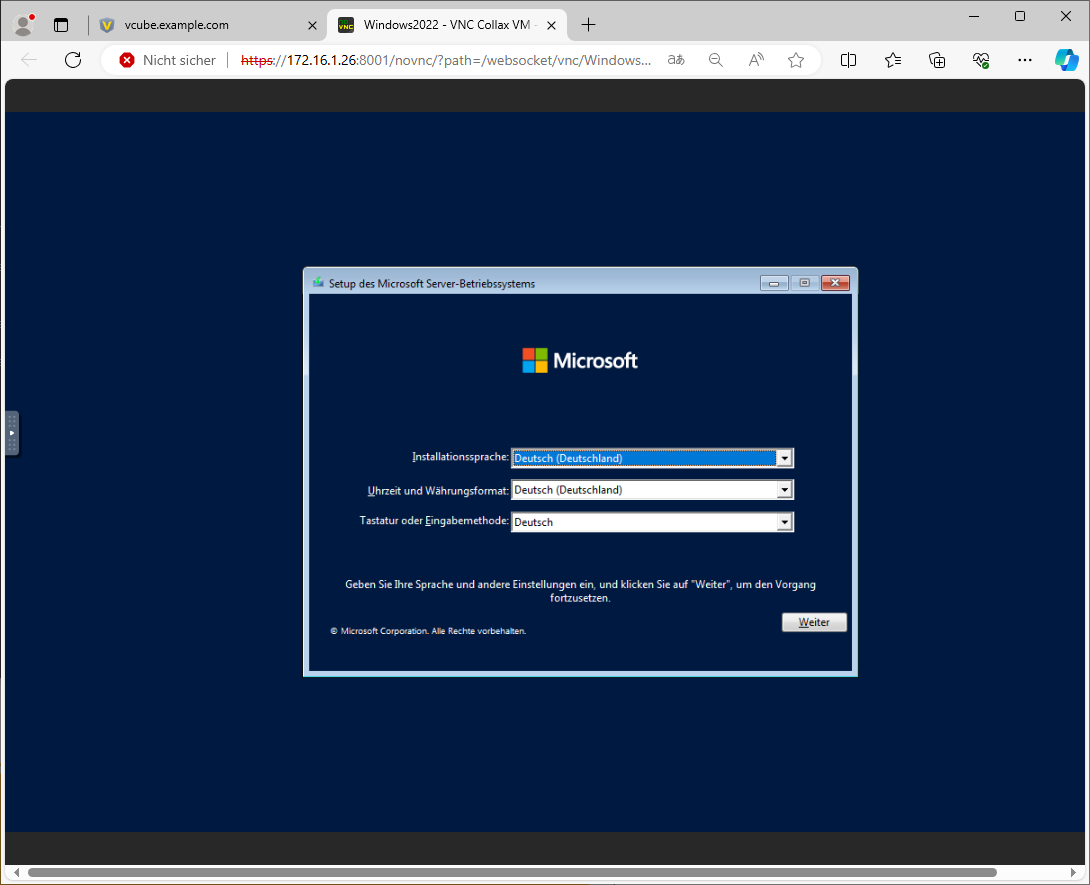
- After completion, the virtual machine can be started.
- You can access the console of the selected virtual machine via the HTML5 screen console.
- As an example, we install a Windows 2022 VM with Virtio drivers, as it is recommended to use VirtIO drivers for the hard disks of a VM for faster performance when reading and writing to the hard disks.
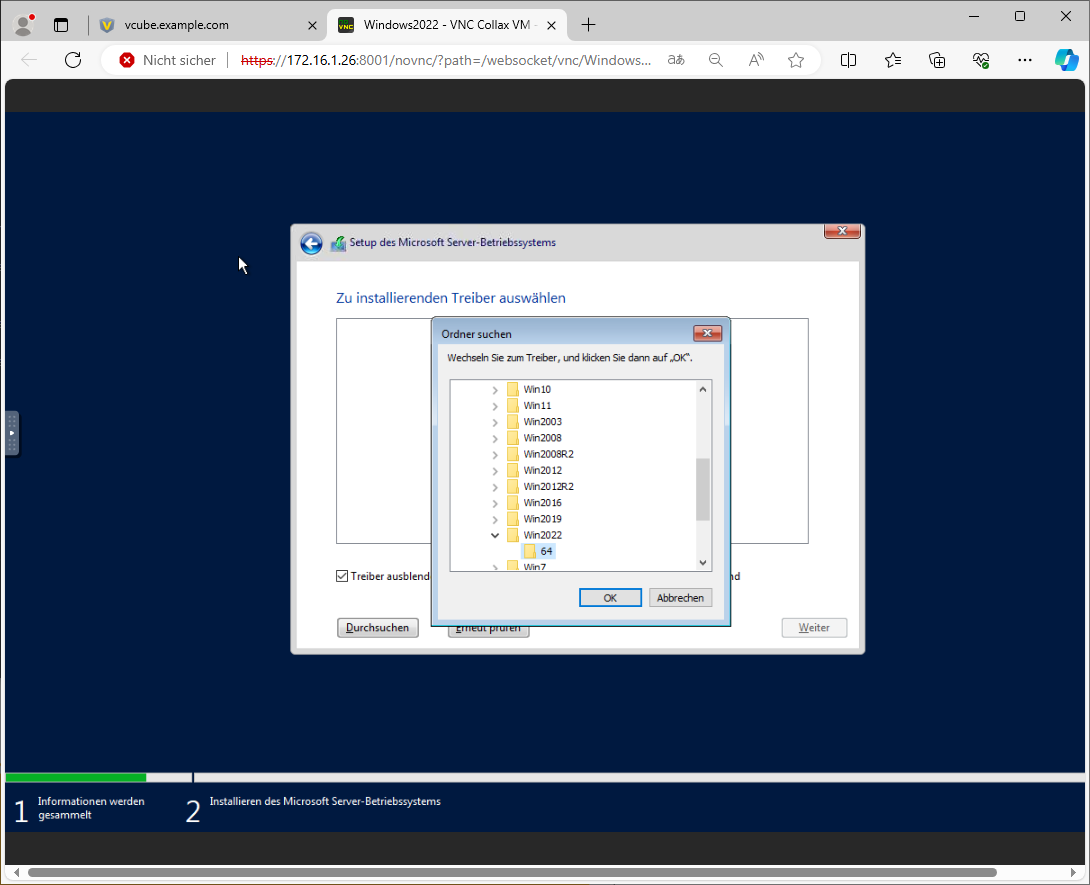
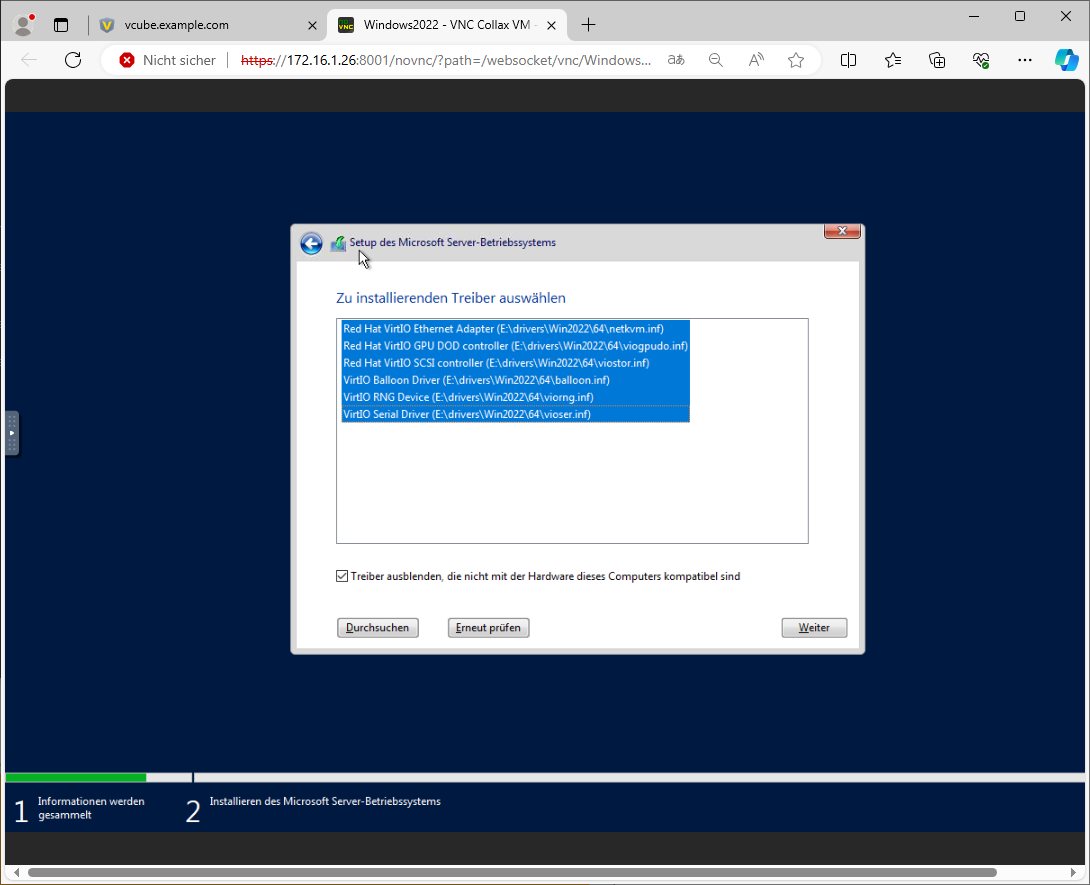
- In the Microsoft operating system setup, click on Load driver to make an additional driver for storage media available for installation.
Switch to the driver CD (already inserted) and select all drivers to be installed with Shift + mouse click.
Then finalise the installation.

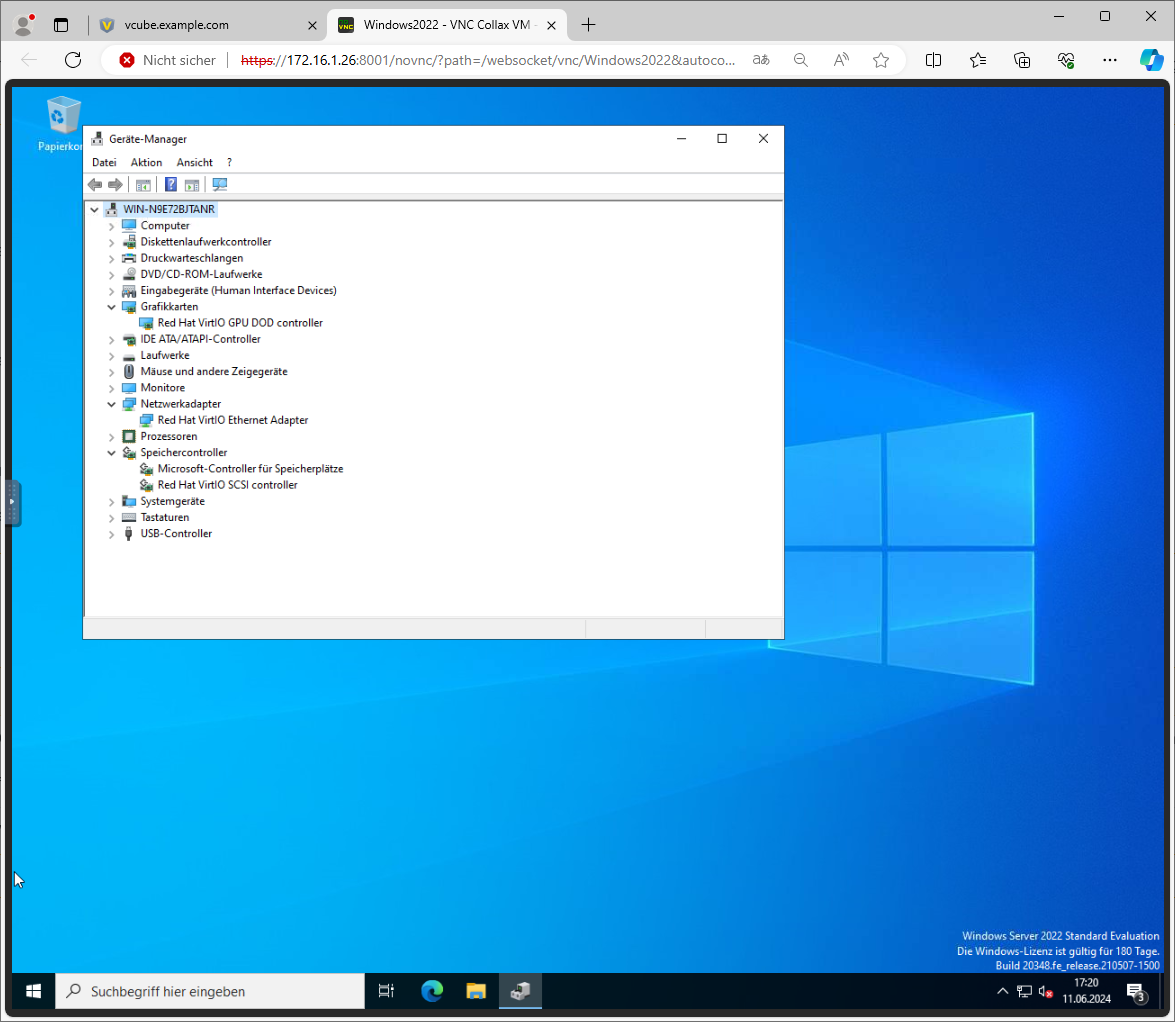
8. Virtio drivers and guest agent
- After installation, the Device Manager appears with all installed drivers for virtual network adapters, virtual drives and QXL graphics cards.
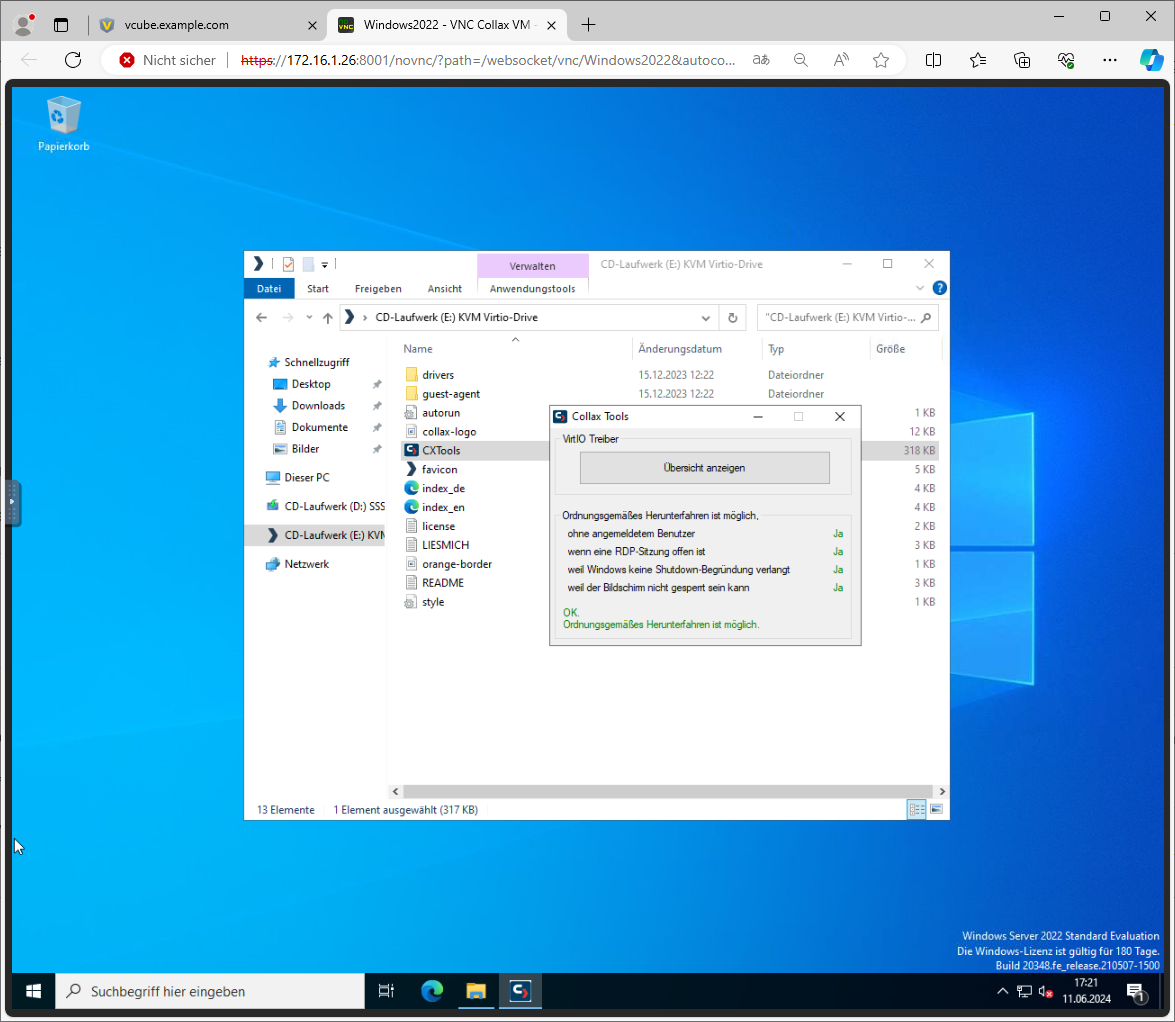
- On the Virtio CD drive, it is recommended to run CXTools and install the QEMU guest agent. The latter offers an alternative method to shutting down via ACPI.
Further information can be found in the index of the Virtio Driver disc.

Migration of existing virtual machines
This article provides a step-by-step guide for a smooth migration of virtual machines from a VMware hypervisor system to Collax. The basic procedure is also applicable to other hypervisor systems such as Microsoft Hyper-V, Xen, Citrix and others.
Support
Our support team will be happy to answer any questions you may have.
We look forward to hearing your experiences and feedback. Please feel free to contact us.